Roomba RVd-Y1 Manual: A Comprehensive Guide
Welcome! This guide details the Roomba RVd-Y1’s features, setup, and operation. It covers Wi-Fi connectivity, app integration, cleaning modes, and essential maintenance procedures for optimal performance.
Congratulations on selecting the Roomba RVd-Y1 robotic vacuum! This intelligent cleaning companion is designed to effortlessly maintain the cleanliness of your floors, freeing up your valuable time. The RVd-Y1 operates within the 2.4 GHz WLAN frequency band, specifically between 2412 MHz and 2472 MHz, ensuring reliable wireless communication.
This manual serves as a comprehensive resource, guiding you through every aspect of your Roomba, from initial setup and app integration to advanced features like smart mapping and customized cleaning schedules. Whether you’re a first-time robot vacuum owner or an experienced user, this guide will empower you to maximize the RVd-Y1’s potential.
The RVd-Y1 isn’t just about automation; it’s about a smarter, more convenient cleaning experience. It’s designed to adapt to your lifestyle, offering various cleaning modes and adjustable suction power to tackle diverse floor types and messes. Prepare to enjoy a consistently clean home with minimal effort!
Unboxing and Initial Setup
Carefully unpack your Roomba RVd-Y1, ensuring all components are present. The box should contain the robot vacuum, the charging base, a power cord, and potentially additional accessories like a spare filter or cleaning tool. Inspect all parts for any visible damage during shipping.
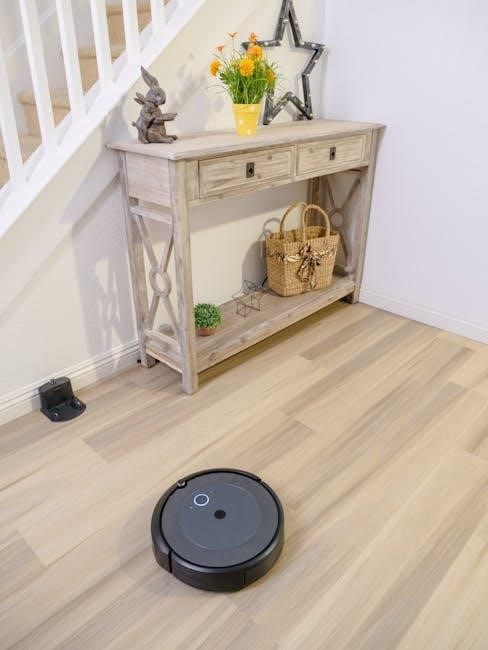
Before first use, remove any protective films or packaging materials from the robot and the charging base. Position the charging base against a wall on a level surface, leaving at least 3 feet of clear space on either side and 6 feet in front. Connect the power cord to the base and plug it into a wall outlet.
Place the Roomba RVd-Y1 onto the charging base, ensuring the charging contacts align. The robot will begin to charge automatically. Allow the robot to fully charge – this may take several hours – before initiating its first cleaning cycle; Download the iRobot Home App to continue the setup process and unlock the full potential of your new cleaning companion.
Component Overview
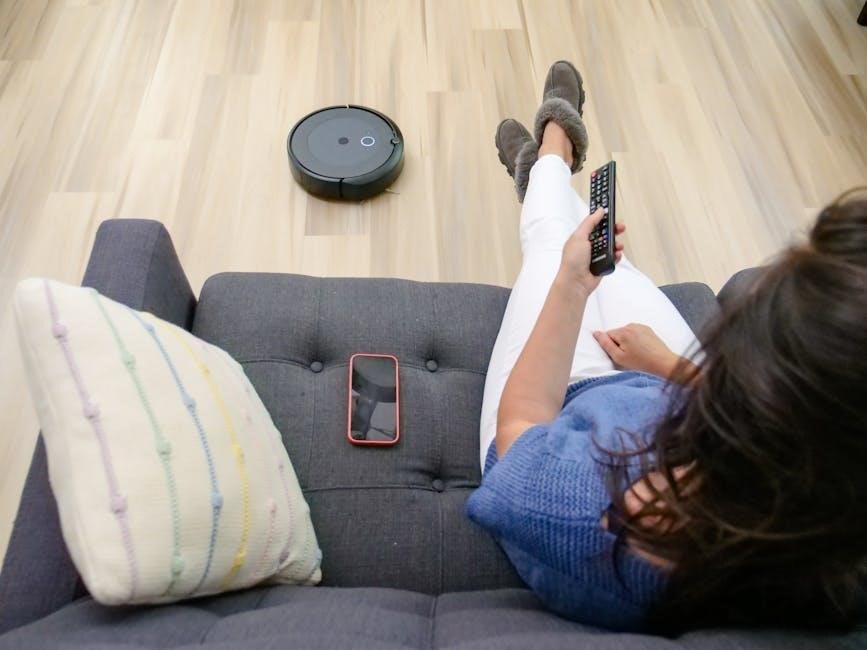
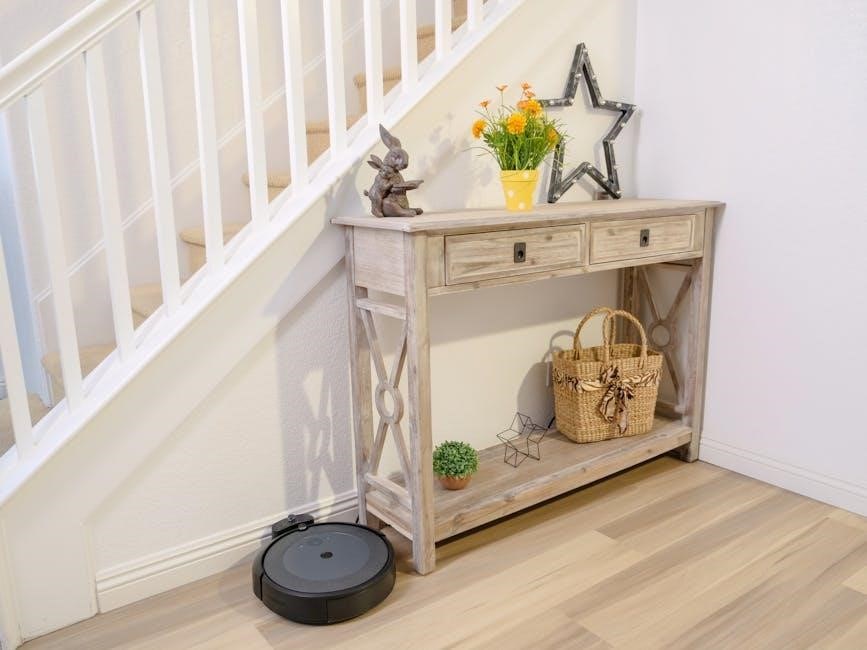
The Roomba RVd-Y1 features a streamlined design for efficient cleaning. Its circular body houses the core cleaning system, including brushrolls, a suction motor, and a dustbin. The top panel incorporates the power button and indicator lights, providing visual feedback on the robot’s status.
The underside of the Roomba reveals the rotating side brush, designed to sweep debris from edges and corners. The dual multi-surface brushrolls effectively lift dirt, dust, and pet hair from various floor types. Accessing the dustbin is straightforward, typically via a release latch on the robot’s body.
The charging base serves as both a charging station and a ‘home’ for the Roomba. It utilizes a wireless charging system, eliminating the need for direct cable connections. Familiarizing yourself with these key components will aid in proper operation, maintenance, and troubleshooting of your RVd-Y1.
Power Button and Indicator Lights
The Roomba RVd-Y1’s power button initiates cleaning cycles and serves as the primary control for turning the robot on and off. A single press typically starts a cleaning session, while a longer press powers the unit down. The indicator lights provide crucial information regarding the robot’s operational status.
A solid white light generally indicates the Roomba is actively cleaning. A blinking white light may signal a temporary pause or an issue requiring attention. Red indicator lights often denote error conditions, such as a full dustbin or a brushroll obstruction. The lights also communicate charging status – a pulsing light during charging and a solid light when fully charged.
Understanding these light patterns is essential for monitoring the Roomba’s performance and addressing any potential problems promptly. Refer to the troubleshooting section of this manual for detailed explanations of specific error codes and their corresponding light indicators.
Dustbin and Filter Location
Maintaining a clean dustbin and filter is crucial for optimal Roomba RVd-Y1 performance. The dustbin is located within the robot’s body and is easily accessible via a designated release latch. Regularly emptying the dustbin – ideally after each cleaning cycle – prevents suction loss and ensures efficient dirt collection.
Inside the dustbin, you’ll find the filter, responsible for trapping fine dust particles and allergens. The filter requires periodic cleaning or replacement, depending on usage frequency. A clogged filter significantly reduces suction power and can strain the robot’s motor. Refer to the maintenance section for detailed filter cleaning instructions.
Properly seating the dustbin and filter after emptying or cleaning is essential. Ensure they are securely locked into place to prevent debris from bypassing the filtration system. Ignoring these steps can compromise cleaning effectiveness and potentially damage the robot.
Charging Base Setup
Proper placement of the Roomba RVd-Y1 charging base is vital for consistent operation. Select a location on a hard, level surface with at least 3 feet of clear space on either side and 6 feet in front. Avoid placing the base near stairs or in areas with high foot traffic.
Ensure the base is connected to a functioning power outlet. The base features indicator lights to confirm power and successful docking. A solid green light typically indicates the base is ready, while a flashing light may signal an issue. Refer to the troubleshooting section if you encounter persistent light errors.
Before the first use, allow the charging base to remain plugged in for a full 24 hours to fully charge the robot. The Roomba RVd-Y1 will automatically return to the base when its battery is low or when cleaning is complete, ensuring it’s always ready for the next scheduled cleaning cycle.
Connecting to Wi-Fi (2.4 GHz WLAN)
The Roomba RVd-Y1 requires a 2.4 GHz Wi-Fi network for full functionality, including app control and smart mapping. It’s crucial to note that the robot does not support 5 GHz networks. Verify your router is broadcasting a 2.4 GHz signal before proceeding.
Download and install the iRobot Home App (detailed in the next section). Open the app and follow the on-screen instructions to add your Roomba RVd-Y1. The app will guide you through the Wi-Fi connection process, prompting you to select your network and enter your password.
Ensure your smartphone or tablet is connected to the same 2.4 GHz Wi-Fi network during setup. The robot utilizes a frequency range between 2412 MHz and 2472 MHz. A stable internet connection is essential for seamless operation and access to all features. If connection fails, restart both the robot and your router.
Roomba RVd-Y1 App Integration
The iRobot Home App is central to controlling and customizing your Roomba RVd-Y1. It unlocks features like scheduling, cleaning mode selection, and map management. Download the app from your device’s app store (iOS or Android) to begin.
Creating an account within the app is the first step. Follow the prompts to register, providing necessary information. Once logged in, the app will guide you through the device pairing process, utilizing your Wi-Fi network (configured previously). Ensure Bluetooth is enabled on your smartphone during pairing.
The app interface features a main dashboard displaying your robot’s status, cleaning history, and map (if applicable). A side panel provides access to settings, schedules, and cleaning reports. Explore the app to discover all available customization options and maximize your cleaning experience.
Downloading and Installing the iRobot Home App
To fully utilize your Roomba RVd-Y1’s capabilities, you’ll need the iRobot Home App; This application serves as the central control hub for your robot vacuum. The first step is downloading the app; it’s readily available on both the Apple App Store (for iOS devices like iPhones and iPads) and the Google Play Store (for Android smartphones and tablets).
Search for “iRobot Home” within your respective app store. Locate the official iRobot app (ensure it’s developed by iRobot) and tap the “Install” or “Get” button. The app will automatically download and install onto your device. Once the installation is complete, an icon representing the iRobot Home App will appear on your home screen or in your app drawer.

Before launching the app, confirm your device meets the minimum system requirements, as listed on the app store page. A stable internet connection is also recommended for a smooth download and installation process.
Account Creation and Device Pairing
After installing the iRobot Home App, you’ll need to create an account or log in if you already have one. Launch the app and follow the on-screen prompts. You’ll typically be asked to provide an email address and create a secure password. Agree to the terms of service and privacy policy to proceed.
Once logged in, the app will guide you through the device pairing process. Ensure your Roomba RVd-Y1 is powered on and within range of your 2.4 GHz Wi-Fi network. Select “Add a Robot” or a similar option within the app. The app will then search for available robots.
When your RVd-Y1 appears in the list, select it. You may be prompted to enter your Wi-Fi network password. Follow the app’s instructions carefully to complete the pairing process. A successful pairing will allow you to control your Roomba directly from your smartphone or tablet.
Navigating the App Interface
The iRobot Home App features a user-friendly interface designed for easy control of your Roomba RVd-Y1. The main dashboard typically displays a map of your home (if Smart Mapping is enabled), cleaning history, and robot status. A prominent “Clean” button initiates a full cleaning cycle.
A sidebar menu provides access to various settings and features. Here, you can schedule cleaning sessions, adjust cleaning preferences (like suction power and cleaning modes), view cleaning reports, and manage your robot’s name and settings. The “Map” section allows you to view and edit the created map, defining Keep Out Zones and Virtual Walls.
The app also includes a “History” tab, showcasing past cleaning runs with details like duration, area cleaned, and any encountered issues. Explore the settings menu to customize notifications and access support resources. Familiarizing yourself with these sections will maximize your Roomba experience.
Cleaning Performance and Features
The Roomba RVd-Y1 delivers robust cleaning performance through a combination of intelligent features. It boasts multiple cleaning modes, including Auto for general cleaning, Spot Clean for focused areas, and Edge Clean for along walls and furniture. These modes cater to diverse cleaning needs.
Suction power is adjustable within the app, allowing you to optimize cleaning for different floor types – higher suction for carpets, lower for hard floors. The Smart Mapping Technology enables the Roomba to learn your home’s layout, creating an efficient cleaning path and remembering frequently visited areas.
This intelligent mapping also allows for customized cleaning zones and virtual boundaries, preventing the Roomba from entering restricted areas. The RVd-Y1’s advanced navigation system ensures comprehensive coverage, minimizing missed spots and maximizing cleaning efficiency. Regular use of these features will maintain a consistently clean home environment.
Cleaning Modes (Auto, Spot Clean, Edge Clean)
The Roomba RVd-Y1 offers three primary cleaning modes to address various cleaning scenarios. Auto Mode is designed for comprehensive, whole-home cleaning, systematically navigating and covering all accessible areas. This is ideal for routine maintenance and general tidiness.

Spot Clean Mode focuses cleaning efforts on a specific, concentrated area – perfect for spills or heavily soiled patches. Simply place the Roomba in the desired location and activate Spot Clean for targeted cleaning. Finally, Edge Clean Mode concentrates on cleaning along walls, around furniture, and in corners, ensuring no dirt is left behind in hard-to-reach spots.

Each mode can be easily selected through the iRobot Home App, providing convenient control over your cleaning preferences. Understanding and utilizing these modes allows you to tailor the Roomba’s performance to your specific needs, maximizing cleaning effectiveness and efficiency.
Suction Power Adjustment
The Roomba RVd-Y1 is equipped with adjustable suction power, allowing you to customize cleaning performance based on floor type and debris level. Lower suction settings are suitable for hard floors and light dust, conserving battery life and minimizing noise. These settings are perfect for daily maintenance and delicate surfaces.
For carpets and rugs, or when tackling heavier debris, increasing the suction power is recommended. This ensures a deeper clean, effectively removing embedded dirt and allergens. The iRobot Home App provides intuitive controls for adjusting suction levels, offering three distinct options: Quiet, Standard, and Max.
Experimenting with these settings will help you find the optimal balance between cleaning power and battery efficiency. Remember that higher suction levels will consume more energy, potentially reducing run time. Regularly adjusting suction power ensures the Roomba RVd-Y1 delivers consistently effective cleaning results.
Smart Mapping Technology
The Roomba RVd-Y1 utilizes advanced Smart Mapping technology to learn and remember your home’s layout. During initial cleaning cycles, the robot systematically explores your floors, creating a detailed map of rooms and obstacles. This map enables efficient navigation, targeted cleaning, and customized scheduling.
Within the iRobot Home App, you can view the generated map, label individual rooms, and establish Keep-Out Zones. These zones prevent the Roomba from entering restricted areas, such as pet food bowls or delicate furniture. The Smart Map also allows for precise cleaning requests – direct the robot to clean a specific room or zone with a simple tap.
Furthermore, the RVd-Y1 intelligently adapts to changes in your home’s layout, updating the map as furniture is moved. This ensures continued efficient cleaning and optimal performance. Regular map updates contribute to a consistently thorough and personalized cleaning experience.
Maintenance and Troubleshooting
Regular maintenance ensures optimal Roomba RVd-Y1 performance. Empty the dustbin after each cleaning cycle, and clean the filter at least weekly to maintain strong suction. Inspect and remove any tangled hair or debris from the brushrolls frequently. A buildup can significantly reduce cleaning effectiveness.
Periodically clean the sensors with a soft, dry cloth to ensure accurate navigation and obstacle detection. If the Roomba encounters an error, consult the iRobot Home App for specific troubleshooting steps and error code definitions. Common issues include brushroll jams, wheel obstructions, and connectivity problems.
For persistent issues, refer to the online support resources or contact iRobot customer care. Avoid using harsh chemicals or abrasive cleaners on any component. Proper maintenance extends the lifespan of your RVd-Y1 and guarantees consistently reliable cleaning performance. Remember to always power off the robot before performing any maintenance tasks.
Dustbin Emptying and Filter Cleaning
Emptying the Dustbin: Regularly emptying the dustbin is crucial for maintaining optimal suction power. Locate the dustbin release button – typically on the robot’s body. Press the button and carefully remove the dustbin. Empty the collected debris into a trash receptacle. Avoid overfilling the dustbin during re-installation.
Filter Cleaning: The filter prevents fine dust particles from re-entering the air. Remove the filter from within the dustbin. Gently tap the filter against a hard surface to dislodge dust. For a deeper clean, you can use a vacuum cleaner with a brush attachment to carefully remove debris.
Filter Replacement: Replace the filter every two months, or more frequently if you have pets or allergies. A clean filter ensures efficient cleaning and prolongs the life of your Roomba RVd-Y1. Always ensure the filter is properly seated before reassembling the dustbin.
Brushroll Maintenance
Regular Inspection: Periodically inspect the brushrolls for tangled hair, strings, or other debris. These obstructions can reduce cleaning effectiveness and strain the motor. Access the brushrolls by flipping the Roomba RVd-Y1 over.
Removing Debris: Use the provided cleaning tool (or small scissors) to carefully remove any tangled material from the brushrolls. Be cautious not to damage the bristles. Ensure both the main brush and the side brushes are free of obstructions.
Brushroll Replacement: Over time, the brushrolls may wear down and lose their effectiveness. Replace the brushrolls every six to twelve months, depending on usage and floor type. Worn brushrolls can leave streaks or fail to pick up debris efficiently. Proper brushroll maintenance ensures optimal cleaning performance.
Sensor Cleaning
Importance of Clean Sensors: The Roomba RVd-Y1 relies on several sensors for navigation and obstacle avoidance. Dust, dirt, or debris accumulating on these sensors can impair their function, leading to erratic behavior or reduced cleaning efficiency.
Locating the Sensors: Identify the cliff sensors (located on the underside of the robot), the wall-following sensor (on the side), and any optical sensors. Refer to the component overview section for precise locations.
Cleaning Procedure: Gently wipe each sensor with a clean, dry microfiber cloth. Avoid using liquids or abrasive cleaners, as these can damage the sensors. Ensure the sensors are free from any visible obstructions. Regular sensor cleaning is crucial for maintaining the robot’s navigational capabilities and preventing collisions.
Troubleshooting Common Issues (Error Codes)
Understanding Error Codes: The Roomba RVd-Y1 utilizes error codes to indicate specific problems. These codes are displayed in the iRobot Home App or via indicator light patterns on the robot itself. Consult the app or this manual for a comprehensive list of error codes and their meanings.
Common Issues & Solutions: Frequent issues include brushroll entanglement (remove obstructions), full dustbin (empty the dustbin), and connectivity problems (ensure a stable 2.4 GHz Wi-Fi connection). If the robot gets stuck, manually reposition it and clear the area.
Resetting the Robot: For persistent issues, a soft reset (holding the power button) can often resolve the problem. If the issue persists, contact iRobot customer support, providing the error code for faster assistance. Regular maintenance, as outlined in this manual, can prevent many common errors.
Battery and Charging
Charging the Roomba RVd-Y1: Before first use, fully charge the robot on the charging base. Ensure the base is connected to a power outlet and positioned on a level surface. The robot will automatically return to the base when battery levels are low, or it can be manually sent back via the iRobot Home App.
Charging Time & Battery Life: A full charge typically takes several hours (approximately 3-4 hours). A fully charged battery provides sufficient power for a complete cleaning cycle, depending on the selected cleaning mode and floor type. Battery life will naturally decrease over time with usage.
Battery Replacement: If the battery no longer holds a sufficient charge, it may need replacing. Contact iRobot customer support for authorized battery replacements. Do not attempt to replace the battery yourself, as this could void the warranty and potentially damage the robot.
Charging Time and Battery Life
Initial Charge: Upon unboxing, place the Roomba RVd-Y1 onto its charging base for a complete initial charge. This typically requires around 3 to 4 hours to reach full capacity. The indicator light on the robot will signal when charging is complete, usually transitioning to a solid color.
Typical Run Time: A fully charged battery allows the RVd-Y1 to operate for approximately 90-120 minutes in Auto mode on hardwood floors. Carpeted surfaces and higher suction power settings will reduce the runtime. The robot automatically returns to the base when the battery is low.
Charging Cycle: The RVd-Y1 utilizes a lithium-ion battery. Frequent, full charging cycles are recommended to maintain optimal battery health. Avoid leaving the robot on the charger continuously after a full charge is achieved, as this can potentially shorten battery lifespan.
Battery Replacement (If Applicable)
Battery Lifespan: The lithium-ion battery within the Roomba RVd-Y1 is designed to retain a significant portion of its original capacity for approximately 2 to 3 years, depending on usage and charging habits. Noticeable decreases in runtime indicate potential battery degradation.
Replacement Procedure: If battery replacement becomes necessary, it’s crucial to use a compatible battery specifically designed for the RVd-Y1 model. Consult the iRobot website or authorized retailers for genuine replacement options. The battery is located within the robot’s body and is typically secured with screws.
Safety Precautions: Always power off the Roomba before attempting battery replacement. Handle the old battery with care and dispose of it responsibly according to local regulations for lithium-ion batteries. Incorrect battery installation can damage the robot or pose a safety hazard.
Safety Precautions
General Safety: Before operating the Roomba RVd-Y1, remove all loose objects, cables, and small items from the floor that could pose a hazard or become entangled in the brushes. Ensure the charging base is placed on a stable, level surface, away from water sources.
Electrical Safety: Only use the provided charging base and power adapter. Do not attempt to disassemble or repair the Roomba or its battery yourself. If the power cord is damaged, discontinue use immediately and contact iRobot support. Avoid operating the Roomba in wet or damp environments.
Operational Safety: Supervise the Roomba during its initial runs to ensure it navigates your home safely. Keep children and pets away from the Roomba while it’s operating. Do not use the Roomba to clean up flammable liquids or hazardous materials. Regularly inspect the brushes and filters for wear and tear.