
Welcome to the Shark Euro Pro X Sewing Machine Manual! This guide provides an introduction to your new machine, highlighting its features, stitching options, and customization capabilities․ Discover how to operate, maintain, and troubleshoot your device effectively with our step-by-step instructions․
Overview of the Manual
This manual is a comprehensive guide for the Shark Euro Pro X Sewing Machine, detailing its operation, features, and maintenance․ It covers essential topics like threading, bobbin winding, and stitch customization․ The manual also addresses troubleshooting, safety precautions, and accessory usage․ Designed for both beginners and experienced sewists, it provides clear instructions to help users maximize their machine’s potential․ By following this guide, you’ll master the basics and explore advanced techniques to enhance your sewing experience․
Importance of Reading the Manual
Reading the Shark Euro Pro X Sewing Machine Manual is crucial for optimal performance and safety․ It ensures you understand the machine’s features, operation, and maintenance․ Proper knowledge prevents errors, avoids damage, and enhances stitching quality․ The manual also highlights warranty details and safety guidelines, protecting both you and the machine․ By following the instructions, you’ll unlock the full potential of your sewing machine, ensuring a smooth and enjoyable sewing experience for years to come․
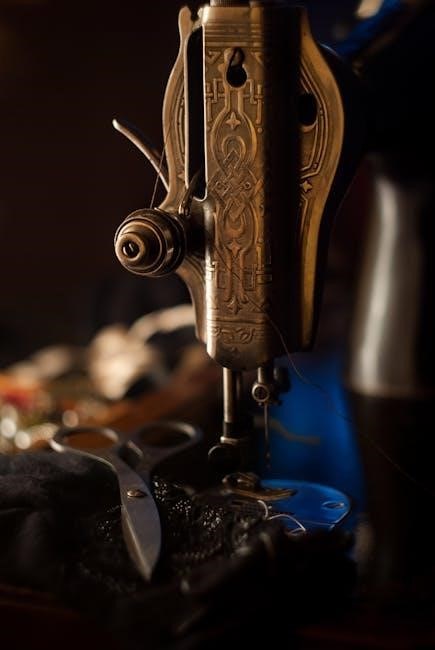
Key Features of the Shark Euro Pro X Sewing Machine
The Shark Euro Pro X Sewing Machine offers an array of advanced features, including a top-loading bobbin for easy thread management and a pattern selector dial for choosing from various stitch options․ It also includes adjustable stitch length and width, allowing for customization based on fabric type․ Additional features like free-arm sewing and compatibility with multiple presser feet enhance versatility․ These features make it suitable for both beginners and experienced sewists, ensuring precise and professional results in every project․

Safety Precautions and Setup
Always keep children away from the machine․ Use the correct voltage and avoid overclocking․ Follow safety guidelines to ensure safe operation and optimal performance of your sewing machine․
Unpacking and Initial Inspection
When unpacking your Shark Euro Pro X sewing machine, carefully inspect the box and contents for damage․ Verify all accessories, such as the power cord, presser feet, and bobbins, are included․ Gently remove the machine from its packaging and wipe down any protective covering․ Inspect the machine for scratches or defects․ Handle the sewing machine with care to avoid damage․ Refer to the accessory list in the manual to ensure all components are accounted for before proceeding․
Placing the Machine on a Stable Surface
Place the Shark Euro Pro X sewing machine on a sturdy, flat surface to ensure optimal performance․ Avoid unstable or uneven tables, as this can cause vibrations or misalignment․ Position the machine in a well-lit area for clear visibility․ Ensure the surface is clean and free from clutter to prevent interference with the machine’s operation․ For added stability, consider using a non-slip mat or adjusting the machine’s feet to level it properly․ This setup ensures smooth sewing and reduces the risk of mechanical issues․
Basic Safety Guidelines
Always prioritize safety when using the Shark Euro Pro X sewing machine․ Keep children and pets away while operating․ Avoid wearing loose clothing or jewelry that could get caught․ Ensure the machine is placed on a stable, dry surface․ Never touch electrical components with wet hands․ Keep the area clear of flammable materials․ Turn off the machine when not in use or during maintenance․ Regularly inspect the power cord for damage․ Follow these guidelines to ensure safe and enjoyable sewing experiences․
Threading the Machine
Threading the Shark Euro Pro X sewing machine involves guiding the thread through the machine’s tension discs and take-up lever, then through the needle․ Always follow the manual’s detailed guide for proper thread placement to ensure smooth stitching and prevent tangles or breakage․
Step-by-Step Threading Guide
Begin by turning the handwheel to raise the take-up lever․
Insert the thread through the machine’s tension discs and take-up lever․
Gently pull the thread to ensure it is seated properly in the tension spring․
Guide the thread through the needle bar and insert it into the needle eye․
Leave a small loop at the end for easy sewing․
Refer to the manual’s diagrams for precise alignment and tension adjustment․
This process ensures smooth operation and consistent stitching quality․
Threading the Bobbin
To thread the bobbin, place it on the winder and pull the thread through the guide․ Wind the thread evenly, ensuring it fills the bobbin without overlapping․ Once full, cut the excess thread․ Insert the bobbin into the machine’s bobbin case, making sure it clicks securely․ Guide the thread through the case’s slot and gently pull to set the tension․ This ensures proper thread flow during sewing․ Always refer to the manual for specific diagrams and tension adjustment tips․
Common Threading Mistakes to Avoid
When threading the Shark Euro Pro X, avoid common mistakes like improper thread alignment, which can cause uneven stitching․ Ensure the thread follows the machine’s designated path without crossing over itself․ Neglecting to secure the thread ends can lead to loose stitching․ Always maintain gentle tension while threading to prevent tangles or breaks․ Misaligning the bobbin during installation is another frequent error, which can disrupt stitch formation․ Regularly check for these issues to ensure smooth operation and consistent stitch quality․
Understanding the Control Panel
The control panel of the Shark Euro Pro X features intuitive controls for stitch selection, tension adjustment, and pattern customization․ Familiarize yourself with the stitch selector dial, stitch width dial, and pattern display to optimize your sewing experience․
Identifying Key Components
The Shark Euro Pro X control panel includes essential elements like the pattern selector dial, stitch width dial, and stitch display․ Locate the reverse stitch button for reinforced stitching and the LED light for better visibility․ The tension dials allow adjustments for optimal stitch quality, while the speed control enables precise sewing․ Familiarize yourself with these components to navigate the machine confidently and customize your sewing projects effectively․
Adjusting Stitch Length and Width
Adjust the stitch length using the designated dial, with settings typically ranging from 0 to 4mm․ For stitch width, use the separate dial, often adjustable between 0 to 5mm․ Longer stitches suit heavier fabrics, while shorter ones are ideal for delicate materials․ To ensure optimal results, always test adjustments on scrap fabric before sewing your final project․ Properly balancing these settings enhances stitch quality and adaptability for various sewing tasks․ Refer to the manual for specific dial positions and customization tips to achieve professional-grade stitching every time․
Using the Pattern Selector Dial
The pattern selector dial allows you to choose from various stitch options․ Turn the dial to select the desired stitch, ensuring it aligns with the stitch display window․ For a straight stitch, position the dial at the designated mark․ For decorative or zigzag stitches, rotate the dial to the corresponding number․ Always align the dial precisely to ensure correct stitch selection․ This feature enhances your sewing experience by offering versatility for different fabrics and projects․ Use the dial to explore the machine’s full range of stitching capabilities effortlessly․ Proper alignment ensures optimal stitch quality and performance․
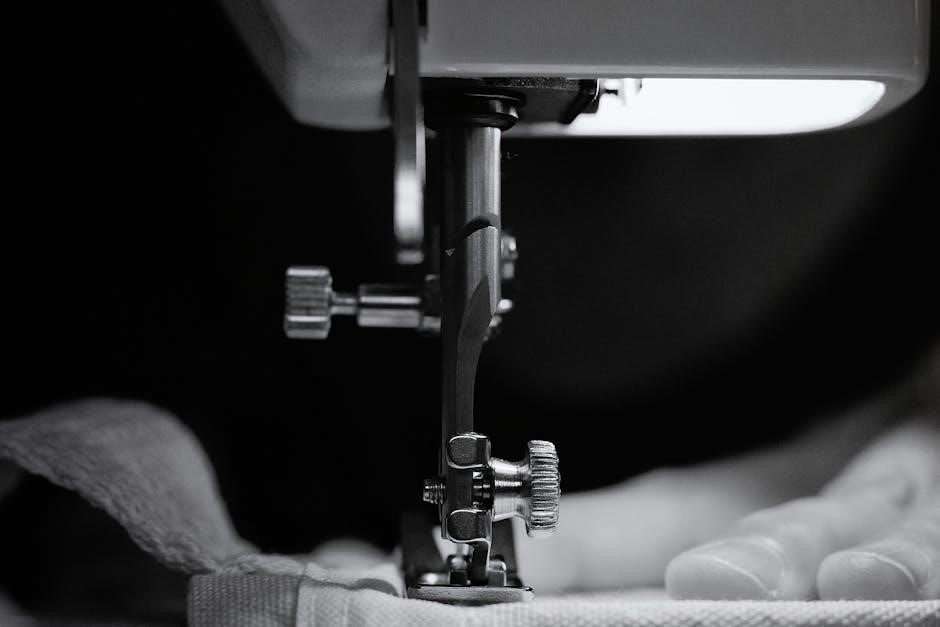
Bobbin and Needle Management
Properly manage your bobbin and needle for optimal sewing performance․ Wind the bobbin evenly, install it correctly, and change the needle regularly to ensure smooth stitching and prevent damage․
Winding the Bobbin Correctly
To wind the bobbin on your Shark Euro Pro X sewing machine, start by turning off the machine and ensuring the presser foot is raised․ Place the bobbin on the bobbin winder, aligning the notch with the pin․ Thread the machine as described in the threading guide, then gently pull the thread to ensure it’s seated properly․ Engage the bobbin winding mechanism and slowly wind the thread, filling the bobbin without overfilling․ Cut the thread and remove the bobbin․ Avoid winding too tightly or loosely for optimal performance․
Installing the Bobbin
After winding the bobbin, lift the presser foot and open the bobbin compartment․ Gently place the bobbin into the bobbin case, ensuring it sits securely․ Thread the end of the bobbin thread through the small notch in the case․ Pull the thread gently to ensure it’s properly seated․ Close the bobbin compartment and lower the presser foot․ Test the machine by sewing a few stitches to ensure the bobbin thread is correctly engaged and the tension is balanced․ Proper installation ensures smooth stitching and prevents thread tangles or breaks during sewing․
Changing the Needle
To change the needle, lift the presser foot and locate the needle clamp screw․ Loosen the screw with a screwdriver, then carefully pull the old needle downward․ Insert the new needle, ensuring the flat side faces the correct direction․ Tighten the screw firmly․ Always use the appropriate needle type for your fabric to prevent damage․ Regularly replacing the needle ensures optimal performance and prevents skipped stitches or thread breakage․ Refer to the manual for specific needle recommendations and further guidance․
Stitch Selection and Customization
Your Shark Euro Pro X sewing machine offers a variety of built-in stitches for diverse fabrics․ Adjust stitch length, width, and pattern settings to customize your sewing projects effortlessly․
Types of Built-in Stitches
The Shark Euro Pro X Sewing Machine features an impressive array of 80 built-in stitches, catering to various sewing needs․ These include straight stitches, zigzag stitches, decorative stitches, and stretch stitches, making it versatile for different fabrics and projects․ The machine also offers automatic one-step buttonhole creation and heavy-duty stitching options for thicker materials like denim or leather․ With such a wide range of stitches, users can achieve professional results for both everyday and specialized sewing tasks․ This variety ensures the machine is suitable for beginners and experienced sewers alike․
Selecting the Right Stitch for Fabric
Selecting the appropriate stitch for your fabric is crucial for optimal results․ For lightweight fabrics like cotton or silk, use straight or simple zigzag stitches․ Heavy-duty materials like denim or leather require stronger stitches, such as the heavy-duty straight stitch or reinforced zigzag․ Delicate fabrics may need a fine stretch stitch to prevent tearing․ Always refer to the manual for specific stitch recommendations based on fabric type to ensure professional-looking results and extend the life of your project․
Adjusting Tension for Optimal Stitch Quality
Proper thread tension is essential for achieving smooth, even stitches․ Start by threading the machine correctly and adjusting the tension dials on both the top thread and bobbin․ Test the tension by sewing on a scrap fabric; if the stitches are uneven, tighten or loosen the dials as needed․ Balanced tension prevents loose threads or puckering, ensuring professional-quality results․ Always refer to the manual for specific guidance tailored to your fabric type and stitch selection․
Maintenance and Troubleshooting
Regular cleaning and lubrication ensure your Shark Euro Pro X runs smoothly․ Troubleshoot common issues like thread jams or uneven stitches by checking tension and alignment․ Refer to the manual for solutions to maintain performance and extend the machine’s lifespan․ Addressing problems early prevents major repairs and keeps your sewing experience seamless and enjoyable․
Regular Cleaning and Lubrication
Regular cleaning and lubrication are essential for maintaining your Shark Euro Pro X sewing machine’s performance․ Turn off and unplug the machine before starting․ Use a soft brush to remove lint and debris from the bobbin area, feed dogs, and stitch plate․ Apply a few drops of sewing machine oil to moving parts, following the manual’s guidelines․ Proper lubrication ensures smooth operation and prevents mechanical issues․ Clean and oil your machine after every heavy use to keep it in optimal condition and extend its lifespan․
Common Issues and Solutions
Common issues with the Shark Euro Pro X sewing machine include thread bunching, broken needles, or uneven stitches․ To resolve these, check thread tension, ensure proper needle installation, and clean lint from the bobbin area․ If the machine is noisy, lubricate moving parts as instructed․ For jammed fabric, gently pull it out and restart․ Always refer to the manual for specific solutions, and consult a professional if issues persist․ Regular maintenance can prevent many of these problems and ensure smooth operation․
When to Contact a Professional
If you encounter issues beyond basic troubleshooting, such as mechanical damage, electrical malfunctions, or complex repair needs, consult a certified professional․ This ensures safety and prevents further damage․ Contact Shark Euro Pro support for authorized service providers․ Regular maintenance can help avoid such situations, but professional assistance is crucial for severe or intricate problems․ Always prioritize your safety and the machine’s longevity by seeking expert help when needed․
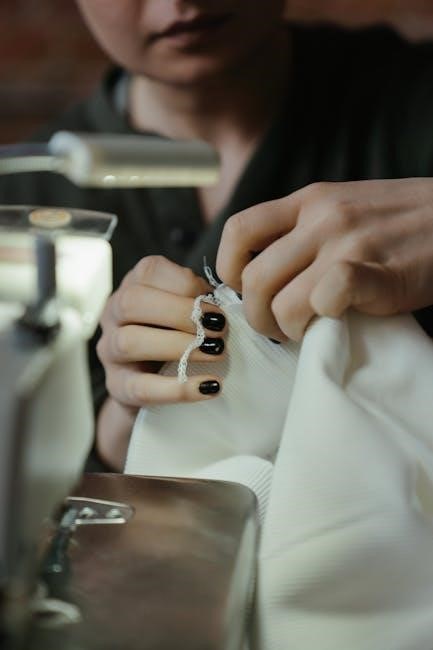
Accessories and Optional Features
Your Shark Euro Pro X sewing machine comes with an accessory kit that includes various presser feet for specialized tasks․ Optional upgrades like additional attachments enhance functionality, catering to diverse sewing needs․ Explore these tools to expand your creative possibilities and improve sewing efficiency with tailored accessories designed for your machine․
Understanding the Accessory Kit
The Shark Euro Pro X sewing machine comes with a comprehensive accessory kit designed to enhance your sewing experience․ Included are various presser feet, such as the zigzag foot, zipper foot, and buttonhole foot, each tailored for specific tasks․ Additional accessories like bobbins, needles, and a seam ripper are also provided․ These tools enable you to tackle a wide range of projects, from basic repairs to intricate designs, ensuring versatility and efficiency in your sewing journey․
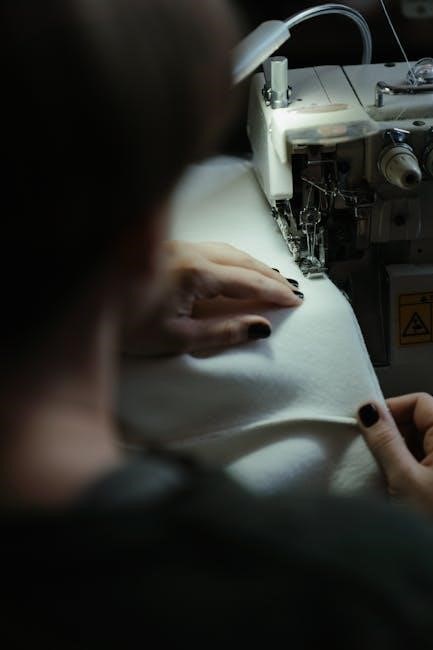
Using Different Presser Feet
Different presser feet are essential for achieving professional results with your Shark Euro Pro X sewing machine․ The zigzag foot is ideal for general sewing, while the zipper foot allows for precise stitching near zippers or thick fabrics․ The buttonhole foot simplifies creating custom buttonholes․ To use them, attach the foot by aligning the shank with the machine’s presser foot holder and securing it firmly․ Always choose the right foot for your project to ensure accuracy and prevent fabric damage․
Optional Upgrades and Attachments
Your Shark Euro Pro X sewing machine can be enhanced with optional upgrades and attachments to expand its functionality․ Consider adding a large extension table for managing bulky projects or a quilting kit for precise stitching․ Additional presser feet, like a walking foot for heavy fabrics or a ruffler foot for gathering, can also be purchased․ These accessories are designed to improve efficiency and versatility, allowing you to tackle a wider range of sewing tasks with ease and precision․ Always ensure compatibility before purchasing․
Advanced Sewing Techniques
Master advanced techniques like free-arm sewing, perfect for stitching cuffs or sleeves․ Tackle heavy-duty fabrics with ease using reinforced stitches and specialized presser feet․ Explore leather crafting by adjusting tension and using the right needles for professional results․
Free-Arm Sewing
Free-arm sewing on the Shark Euro Pro X allows for easier handling of small or cylindrical projects like sleeves, pant legs, and children’s clothing․ By removing the auxiliary bed, you gain access to the free arm, enabling smooth stitching around curves․ This feature is ideal for delicate fabrics and intricate designs, offering greater control and precision․ Ensure the machine is set to the appropriate stitch length and width for your fabric type before starting your project․
Sewing with Heavy-Duty Fabrics
The Shark Euro Pro X excels at sewing heavy-duty fabrics like denim, canvas, and leather․ For thick materials, use a heavy-duty needle and adjust the stitch length and width for optimal results․ Engage the walking foot or Teflon foot to ensure smooth fabric feeding․ Always pre-test stitches on scraps to ensure proper tension and penetration․ The machine’s robust construction and powerful motor make it ideal for tackling tough projects with ease and precision, delivering professional-grade stitching every time․
Using the Machine for Leather Crafting
The Shark Euro Pro X is well-suited for leather crafting due to its powerful motor and precise stitching․ Use a leather needle and adjust stitch length and width for thickness․ Engage the Teflon foot to prevent sticking․ Always test stitches on scrap leather first․ The machine’s robust design ensures clean, even stitching, making it ideal for creating professional-looking leather goods like bags, belts, or upholstery with ease and precision․
Warranty and Support Information
Your Shark Euro Pro X comes with a comprehensive warranty․ Refer to the manual for details on coverage and support options, including customer service and online resources․
Understanding the Warranty
The Shark Euro Pro X Sewing Machine Manual includes detailed warranty information․ The warranty typically covers manufacturing defects for a specified period, ensuring parts and labor are repaired or replaced free of charge․ Registration is often required to activate the warranty․ Review the manual for terms, conditions, and exclusions․ This section ensures you understand your coverage and how to maintain warranty validity․ Refer to the manual or manufacturer’s website for additional details and support options․
Customer Support Options
The Shark Euro Pro X Sewing Machine Manual provides access to dedicated customer support․ Users can contact the manufacturer via phone, email, or live chat for assistance․ Additionally, the official website offers a comprehensive support section with FAQs, troubleshooting guides, and downloadable resources․ For further help, online communities and forums are available to connect with other users and experts․ Always refer to the manual or the manufacturer’s website for the most accurate and up-to-date support information․
Online Resources and Communities
Enhance your sewing experience with online resources and communities dedicated to the Shark Euro Pro X․ Join forums, social media groups, and sewing blogs where users share tips, tutorials, and projects․ Visit the official Shark Euro Pro website for downloadable guides, video tutorials, and FAQs․ Engage with fellow sewists to troubleshoot issues, explore creative ideas, and stay updated on the latest sewing trends and machine optimizations․