
Welcome to the Stanley Garage Door Opener Instruction Manual. This guide provides essential information for safe installation, operation, and troubleshooting of your opener, ensuring optimal performance and longevity.
1.1 Importance of Following the Manual
Following the Stanley Garage Door Opener manual is crucial for ensuring safe and proper installation, operation, and maintenance. The manual provides detailed instructions to prevent accidents, such as injuries or property damage, and ensures the opener functions correctly. By adhering to the guidelines, users can avoid common issues and troubleshoot problems effectively. It also serves as a reference for understanding safety features, like automatic reverse, and maintaining optimal performance. Ignoring the manual may lead to malfunctions or security risks, making it essential to follow every step carefully.
1.2 Safety Precautions and Warnings
Adhering to safety precautions is vital when working with your Stanley Garage Door Opener. Always disconnect power before servicing to avoid electric shock or injury. Keep children and pets away from moving parts and ensure the door is closed when not in use. Never modify the opener’s components without consulting the manual, as this can lead to malfunctions. Regularly inspect and maintain the system to prevent accidents. Follow all warnings and guidelines provided to ensure safe operation and protect yourself and others from potential harm. Proper installation and maintenance are key to avoiding hazards.
1.3 Overview of Stanley Garage Door Opener Models
Stanley offers a variety of garage door opener models designed to meet different needs. The U-Install series is popular for its easy installation and user-friendly features. The Vemco V2000 model is known for its reliability, while the UT300 model provides durable performance with a chain drive system. Each model includes features like remote control operation, automatic reverse safety, and customizable access codes. Whether you’re looking for a basic opener or one with advanced features, Stanley has options to suit your garage door requirements. Proper model selection ensures efficient and safe operation for years.

Pre-Installation Requirements
Ensure you have all necessary tools and materials before starting. Read the manual carefully to understand components and safety guidelines. Prepare the garage for installation.
2.1 Tools and Materials Needed
To begin, gather essential tools: a screwdriver, wrench, ladder, and measuring tape. Ensure you have all materials provided, including screws, bolts, and the opener kit. A power source and drill may also be required. Safety gear like gloves and safety glasses is recommended. Organize all components and tools in a clean, accessible workspace. Double-check the manual for specific items needed for your model. Proper preparation ensures a smooth installation process and minimizes delays. Always follow safety guidelines when handling tools and materials.
2.2 Understanding the Components of the Opener
Familiarize yourself with the garage door opener components, including the motor unit, drive system (chain or belt), safety sensors, control panel, and remote. The motor powers the opener, while the drive system moves the door. Safety sensors prevent accidents by detecting obstructions. The control panel manages settings, and the remote offers convenience. Understanding each part ensures proper installation and operation. Refer to the manual for detailed diagrams and descriptions specific to your Stanley model. This knowledge helps troubleshoot issues effectively and ensures safe usage.
2.3 Reading the Manual Carefully
Reading the Stanley garage door opener manual is essential for proper installation, operation, and troubleshooting. The manual provides detailed instructions, safety precautions, and component descriptions. It includes step-by-step guides for assembly, programming, and maintenance. Familiarize yourself with safety features like automatic reverse and sensor alignment. Diagrams and charts help clarify complex processes. Always follow the manual’s instructions to ensure optimal performance and prevent accidents. Refer to it before attempting any repairs or adjustments to avoid damaging the opener or causing injuries. This careful reading will help you master your garage door opener’s functionality and maintain its longevity.
Installation Process
The installation process involves assembling and mounting the opener, connecting the motor and drive system, and installing safety sensors. Ensure all components are securely fastened, and follow the manual’s step-by-step instructions to avoid errors. Proper alignment and connection of parts are crucial for smooth operation. After completing the installation, test the opener to ensure it functions correctly and safely. This process requires attention to detail and adherence to safety guidelines to achieve a successful setup.
3.1 Assembly and Mounting Instructions
Begin by assembling the garage door opener components according to the manual. Carefully unpack and organize all parts, ensuring nothing is damaged. Locate the motor unit, rail, and mounting brackets. Attach the rail to the motor following the provided instructions. Next, mount the brackets securely to the garage ceiling, ensuring proper alignment with the door’s center. Use the included hardware to fasten the motor to the brackets. Tighten all bolts firmly but avoid overtightening. Double-check the assembly for stability and levelness before proceeding to the next step. Proper assembly ensures smooth operation and safety.
3.2 Connecting the Motor and Drive System
After assembling the motor and rail, connect the drive system by attaching the chain or belt to the motor’s gear. Ensure the chain or belt is properly aligned with the idler pulley and trolley. Secure the trolley to the rail using the provided screws. Connect the motor to the drive system, making sure all components are tightly fastened. Finally, attach the emergency release rope to the trolley. Test the system by manually moving the trolley to ensure smooth operation. Avoid over-tightening the chain, as this may cause misalignment or damage to the motor.
3.3 Installing Safety Sensors and Control Panel
Begin by mounting the safety sensors on both sides of the garage door, ensuring they are aligned and 6 inches above the floor. Connect the sensors to the motor unit, following the wiring diagram in the manual. Next, install the control panel near the garage entrance, securing it with screws. Wire the panel to the motor, ensuring all connections are tight. Test the sensors by passing an object through the beam; the door should reverse direction. Finally, program the control panel and test all functions to ensure proper operation and safety.
3.4 Finalizing the Installation
After completing the assembly and connections, ensure all components are securely fastened. Align the garage door properly with the opener’s track system and test its movement. Check the safety sensors to confirm they are functioning correctly. Tighten all screws and bolts for stability. Finally, review the manual for any model-specific adjustments and perform a full test cycle, opening and closing the door multiple times to ensure smooth operation. Make any necessary fine-tuning adjustments to the door’s alignment or sensitivity settings.
Programming the Garage Door Opener
Program your Stanley opener by setting the access code for the keypad and syncing the remote control. Use dip switches to ensure compatibility and security. Refer to the manual for detailed steps to complete the setup successfully.
4.1 Setting the Access Code for Keypad
The access code is essential for secure keypad operation. Choose a unique code and enter it to unlock the keypad. Locate the dip switches, usually found under the keypad or in the motor unit, and set them according to the code. Once programmed, test the code to ensure proper functionality. Refer to the manual for specific dip switch locations and detailed instructions to avoid errors during setup. This step ensures only authorized users can operate the garage door, enhancing security.
4.2 Programming the Remote Control
Programming the remote control ensures seamless operation of your Stanley garage door opener. Locate the “Learn” or “Home” button on the motor unit, often near the antenna or LED light. Press and release this button to enter programming mode. Within 30 seconds, press the desired button on your remote control to sync it with the opener. Test the remote to confirm proper pairing. If issues arise, ensure batteries are fresh and the opener is functioning correctly. Refer to your manual for model-specific instructions, as procedures may vary slightly.
4.3 Understanding Dip Switch Codes
Dip switches are small toggles on the remote and opener that set a unique frequency code, ensuring your Stanley garage door opener operates securely. Match the switch positions on both the remote and opener to synchronize communication. These codes prevent interference from other devices and unauthorized access. After setting, test the remote to confirm functionality. If issues occur, recheck the switch alignment or consult the manual for guidance. Proper dip switch configuration is crucial for reliable operation and security of your garage door system.
4.4 Syncing the Opener with the Garage Door
To ensure smooth operation, sync your Stanley garage door opener with the door by adjusting the opener’s settings to match the door’s weight and travel limits. Start by manually moving the door to its fully open and closed positions to identify its natural travel range. Next, use the adjustment screws on the opener to set the open and close limits. Test the door by operating it with the remote or wall switch, ensuring it stops precisely at the set points. If the door hesitates or doesn’t align, fine-tune the limits until it operates smoothly. Proper synchronization is essential for safe and efficient functionality.
Operating the Garage Door Opener
Operate your Stanley garage door opener using the wall switch or remote control. The automatic reverse feature ensures safety by stopping and reversing if obstacles are detected. For manual operation, disengage the opener and lift the door smoothly. Always ensure proper alignment of sensors for seamless functionality.
5.1 Using the Wall Switch and Remote Control
Operating your Stanley garage door opener is straightforward. Use the wall switch to open or close the door by flipping it. The remote control offers convenience, allowing operation from a distance. Ensure the access code is set for keypad use. To sync the remote, follow the dip switch instructions in the manual. Always test the opener after programming to ensure proper functionality. Keep the remote batteries charged and replace them as needed. Regularly check sensor alignment to maintain smooth operation and safety features. Proper use ensures reliability and longevity of your Stanley garage door opener system.
5.2 Understanding Automatic Reverse Safety Feature
The automatic reverse safety feature on your Stanley garage door opener is designed to prevent accidents by reversing the door’s direction if an obstacle is detected. Infrared sensors installed near the floor detect objects or people in the door’s path. If the door encounters resistance while closing, it will automatically stop and reopen. This feature enhances safety, especially for children and pets. Ensure the sensors are clean and properly aligned for reliable operation. Regularly test the feature by placing an object in the door’s path to confirm it functions correctly.
5.3 Opening and Closing the Door Manually
To open or close your garage door manually, locate the emergency release mechanism on your Stanley opener. Pull the handle down to disconnect the door from the motor; Once disconnected, lift the door carefully, ensuring it is balanced. For closing, lower the door slowly and secure it with a lock if available. Always handle the door with care to avoid injury. This feature is handy during power outages or system malfunctions, allowing you to operate the door safely and efficiently manually.
Troubleshooting Common Issues
Troubleshoot common problems like door misalignment, sensor issues, or remote malfunctions by checking power sources, cleaning sensors, and lubricating moving parts. Resetting the opener may resolve many issues.
Consult the manual for detailed solutions.
6.1 Door Not Closing Properly
If your Stanley garage door isn’t closing properly, check for obstructions, misaligned sensors, or uneven door tracks. Ensure the sensors are clean and properly aligned. Verify the door’s balance and alignment. Consult the manual for detailed troubleshooting steps, such as resetting the opener or adjusting the limit settings. If issues persist, contact Stanley customer support for further assistance. Regular maintenance and inspections can prevent such problems. Always refer to the manual for specific guidance tailored to your model.
6.2 Remote Control Not Responding
If your Stanley remote isn’t responding, replace the batteries and ensure they’re correctly installed. Check for interference from other devices. Resynchronize the remote with the opener by locating the “Learn” or “Home” button near the motor’s antenna. Press and hold it until the LED blinks, then activate the remote. If issues persist, consult the manual for model-specific reset procedures. Ensure the opener’s circuit board is functioning properly. Contact Stanley support if problems remain unresolved after these steps. Regular checks can prevent such issues from arising.
6.3 Strange Noises During Operation
If your Stanley garage door opener produces strange noises during operation, inspect the chain or belt for wear. Lubricate moving parts and clean tracks to reduce friction. Check for loose screws or misaligned components. If noises persist, replace worn parts. Ensure proper alignment of the door and opener. For older models, consider upgrading to a quieter belt-drive system. Regular maintenance can prevent such issues. If noises are severe, consult the manual or contact Stanley support for assistance. Addressing this promptly can prevent further damage and ensure smooth operation;
6.4 Resetting the Garage Door Opener
To reset your Stanley garage door opener, locate the “Learn” or “Home” button on the motor unit, often found near the antenna or LED light. Depending on your model, you may need to remove an access panel; Press and hold the button until the LED flashes, indicating a factory reset. After resetting, reprogram your remote control and keypad. If issues persist, consult the manual or contact Stanley customer support for further assistance. Regular resets can help resolve connectivity or operational problems.
Maintenance and Repair
Regular maintenance ensures your Stanley garage door opener performs reliably. Lubricate moving parts, inspect and replace worn components, and clean sensors and tracks to maintain optimal functionality.
7.1 Lubricating Moving Parts
Lubricating the moving parts of your Stanley garage door opener is crucial for smooth operation. Use a silicone-based spray lubricant on the chain, gears, and rollers. Avoid oil, as it can attract dust and dirt. Apply the lubricant sparingly, ensuring no dripping occurs. Wipe off any excess with a clean cloth; Regular lubrication prevents wear and tear, reduces noise, and ensures the opener runs efficiently. This simple maintenance step can extend the lifespan of your garage door opener and maintain its performance.
7.2 Replacing Worn-Out Components
Regularly inspecting and replacing worn-out components is essential for maintaining your Stanley garage door opener’s performance. Check the chain, belt, and gears for signs of wear. If damaged, replace them with genuine Stanley parts to ensure compatibility. Refer to your manual for specific part numbers and installation instructions. Always disconnect power before starting repairs and wear safety gloves. If unsure about any replacement, consult a professional to avoid further damage or safety risks.
7.3 Checking and Replacing the Battery
Regularly check the battery in your Stanley garage door opener’s remote control or keypad. Use a multimeter to test voltage; if it reads below 9V, replace the battery. To replace, remove the cover, take out the old battery, and install a new one of the same type (usually 12V). Ensure proper disposal of the old battery. After replacement, test the remote to confirm functionality. This simple maintenance ensures reliable operation and prevents unexpected malfunctions.
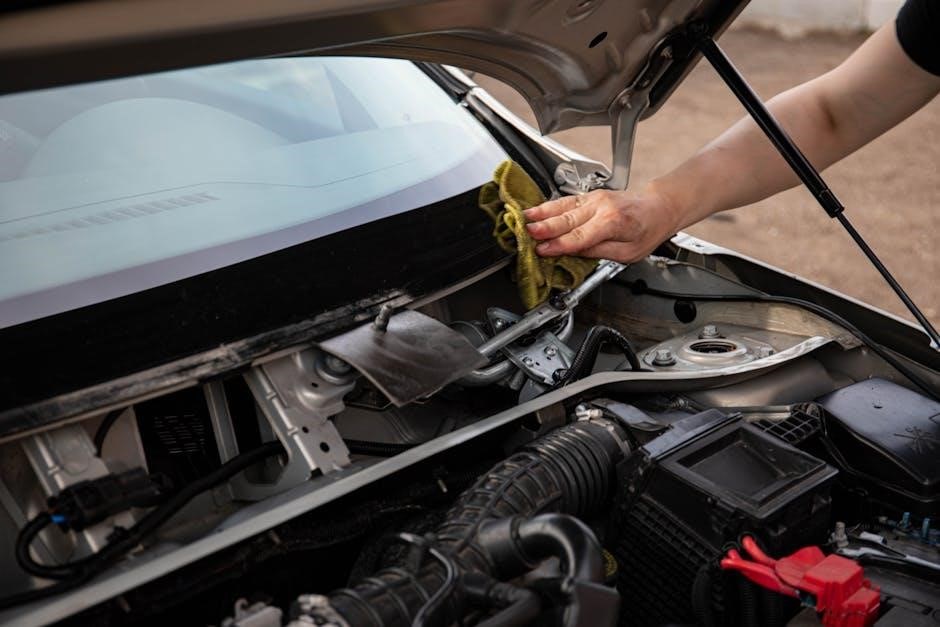
7.4 Cleaning the Sensors and Tracks
Regularly clean the safety sensors and tracks to ensure smooth operation. Use a soft, dry cloth to wipe the sensors, removing dirt or cobwebs. For the tracks, use compressed air to clear debris and dust. Avoid using lubricants on tracks unless specified in the manual. Check for misalignment or obstructions and adjust if necessary. Clean the sensors monthly and tracks every two months to prevent malfunctions. Proper maintenance ensures reliable performance and extends the lifespan of your Stanley garage door opener.

Safety Features and Considerations
Stanley garage door openers include emergency releases, automatic reverse, and sensor alignment checks. Regular maintenance prevents accidents, and keeping children away ensures safe operation.
8.1 Understanding the Emergency Release Mechanism
The emergency release mechanism allows manual operation of your garage door during power outages or system failures. Located near the motor, it disengages the opener, enabling you to open or close the door manually. To activate it, pull the emergency release cord firmly. This feature ensures safety and accessibility when the opener is non-functional. Always ensure the door is fully closed before re-engaging the opener to avoid damage or injury.
- Locate the red emergency release cord near the motor.
- Pull the cord down to disengage the opener.
- Manually operate the door with care.
This mechanism is a critical safety feature, ensuring you can always control your garage door, even in emergencies.
8.2 Importance of Regular Maintenance
Regular maintenance is crucial for ensuring the longevity and smooth operation of your Stanley garage door opener. Proper upkeep prevents wear and tear, reduces the risk of unexpected failures, and enhances safety. Key tasks include lubricating moving parts, inspecting and cleaning sensors, and replacing worn components. Regular checks also help identify potential issues early, avoiding costly repairs. A well-maintained opener ensures reliable performance and prolongs its lifespan, providing peace of mind and continuous functionality.
- Lubricate moving parts annually to reduce friction.
- Inspect and clean safety sensors for accurate detection.
- Replace worn components promptly to prevent breakdowns.
Consistent maintenance ensures your garage door opener operates safely and efficiently for years to come.
8.3 Keeping Children and Pets Away
Ensure the safety of children and pets by keeping them away from the garage door and its components. Teach children not to play near the door or opener. Install the wall switch out of their reach. Never let pets wander unsupervised in the garage. Regularly inspect for any obstructions and educate family members on proper usage. This prevents accidents and ensures smooth operation. Always supervise children and pets when the door is in motion.
8.4 Ensuring Proper Alignment of Sensors
Proper alignment of safety sensors is critical for your Stanley garage door opener’s functionality and safety. Misaligned sensors can cause the door to malfunction or reverse unexpectedly. Regularly inspect the sensors for dirt or obstructions and clean them as needed. Ensure the sensors are correctly positioned and their LED lights indicate proper alignment. If the LEDs are dim or unlit, adjust the sensors until they align correctly. Never disable safety sensors, as this can lead to accidents. Misaligned sensors may prevent the door from closing or cause unintended operation, posing a safety risk to people and pets.

Advanced Features and Upgrades
Explore advanced features like smart technology integration, wireless keypads, and enhanced security codes to upgrade your Stanley garage door opener’s functionality and convenience.
9.1 Integrating Smart Technology
Integrating smart technology with your Stanley garage door opener enhances convenience and security. By connecting your opener to a smart system, you can control it remotely via smartphones or voice assistants like Alexa. This allows you to monitor and operate your garage door from anywhere, receive notifications, and schedule automatic openings or closings. Smart integration also enables compatibility with home automation systems, ensuring seamless functionality. Follow the manual’s firmware update instructions to ensure your opener supports smart features, optimizing performance and staying ahead with modern advancements.
9.2 Upgrading to a Wireless Keypad
Upgrading to a wireless keypad enhances your garage door opener’s functionality and convenience. A wireless keypad allows you to open and close your garage door without a remote, using a secure access code. To install, sync the keypad with your opener by following the dip switch code instructions in the manual. Mount the keypad near the garage entrance for easy access. This upgrade is ideal for homes without remotes or for added security. Ensure compatibility with your Stanley model and refer to the manual for specific programming steps to complete the setup successfully.
9.3 Enhancing Security with Additional Codes
Enhance your garage door opener’s security by setting up additional access codes for the keypad. This feature allows multiple users to have unique codes, improving control over who can access your garage. To set up additional codes, refer to the manual for instructions on programming the keypad. Ensure codes are strong and shared securely. If a code is compromised, it can be easily deleted or changed; This feature is particularly useful for granting temporary access to guests or service providers without compromising your primary security settings. Regularly updating codes adds an extra layer of protection.
9.4 Firmware Updates for Optimal Performance
Firmware updates are crucial for maintaining optimal performance and security of your Stanley garage door opener. Regular updates can improve functionality, enhance security features, and ensure compatibility with the latest smart technologies; To update your opener’s firmware, refer to the manual for step-by-step instructions, which may involve connecting the opener to a computer or using a smartphone app. Always check for the latest firmware version on the manufacturer’s website. By keeping your firmware up to date, you ensure your opener operates efficiently and remains secure against potential vulnerabilities.
10.1 Verifying Proper Functionality
To ensure your Stanley garage door opener functions correctly, perform a thorough test. Open and close the door using both the wall switch and remote control. Check that the door stops and reverses when encountering obstacles, confirming the automatic reverse safety feature works. Verify that the keypad access code and remote controls operate consistently. Inspect the alignment of safety sensors to ensure they are clean and properly aligned. Finally, confirm that all lights and sounds indicate normal operation. If any issues arise, consult the troubleshooting section or contact customer support for assistance. Proper functionality ensures safety and convenience.
10.2 Storing the Manual for Future Reference
After completing the installation and setup of your Stanley garage door opener, store the manual in a safe, dry location for future reference. This ensures easy access for troubleshooting, maintenance, or programming changes. Consider digitizing the manual by downloading it from the manufacturer’s website and saving it to a cloud storage service or your personal device. Additionally, note any custom settings, such as access codes, separately for quick reference. Keeping the manual organized and accessible will help maintain your opener’s performance and simplify future adjustments or repairs.
10.3 Contacting Customer Support for Assistance
If you encounter issues with your Stanley garage door opener that troubleshooting cannot resolve, contact customer support for professional assistance. Visit the official Stanley website for contact details, including phone numbers, email addresses, and live chat options. Provide your opener’s model number and a detailed description of the problem to ensure prompt and effective support. Additionally, check the website for downloadable resources, FAQs, and repair charts that may address your specific concern before reaching out to the support team.