Sourdough bread is a timeless‚ traditional bread made using a natural starter culture instead of commercial yeast‚ offering a unique flavor and texture that rewards patience and practice.
What Makes Sourdough Unique
Sourdough bread stands out due to its use of a natural wild yeast starter‚ creating a distinctive tangy flavor and chewy texture. The fermentation process‚ driven by lactic acid‚ results in a slower rise and a more complex profile compared to traditional bread. This method enhances digestibility and retains more nutrients‚ making it a favorite for bread enthusiasts seeking authenticity and depth in every loaf.
Benefits of Making Sourdough at Home
Creating sourdough at home offers rewarding experiences and health benefits. It allows for full control over ingredients‚ ensuring freshness and quality. The process is meditative and fulfilling‚ fostering patience and culinary mastery. Homemade sourdough is often more nutritious‚ with lower phytate levels and better digestibility. Plus‚ it’s cost-effective and customizable‚ enabling unique flavor variations. Each loaf becomes a personal achievement‚ connecting you to a centuries-old baking tradition while enjoying delicious‚ crusty bread straight from your oven.

Understanding the Sourdough Starter
A sourdough starter is a living mixture of wild yeast and bacteria‚ naturally occurring in flour and water‚ essential for fermentation and leavening homemade bread.
What is a Sourdough Starter?
A sourdough starter is a naturally occurring mixture of wild yeast and bacteria that ferments sugars in flour‚ producing carbon dioxide and lactic acid. It acts as a leavening agent‚ replacing commercial yeast. Created by allowing flour and water to sit‚ it develops a bubbly‚ frothy texture and a tangy aroma. A healthy starter is active‚ doubling in size after feeding‚ and is essential for the unique flavor and texture of sourdough bread. Proper care and feeding ensure its vitality for consistent baking results.
How to Create and Maintain a Sourdough Starter
To create a sourdough starter‚ mix equal parts of flour and water in a clean container. Let it sit at room temperature for 24-48 hours to allow natural yeast and bacteria to activate. Feed it daily with fresh flour and water to encourage fermentation. A healthy starter will bubble and emit a tangy aroma. Maintain it by refrigerating and feeding it weekly‚ or discarding half before feeding if not baking frequently. Regular care ensures the starter remains active and robust for consistent baking results.
Troubleshooting Common Starter Issues
If your sourdough starter is too slow‚ ensure it’s at room temperature and fed fresh flour regularly. Overly active starters may need less flour or refrigeration to slow fermentation. A sour smell could indicate over-fermentation‚ while a lack of bubbles suggests under-activity. Adjust feeding schedules or use cooler temperatures to balance. If mold appears‚ discard the starter and begin anew. Consistent care and observation are key to maintaining a healthy‚ thriving sourdough starter for optimal baking results.
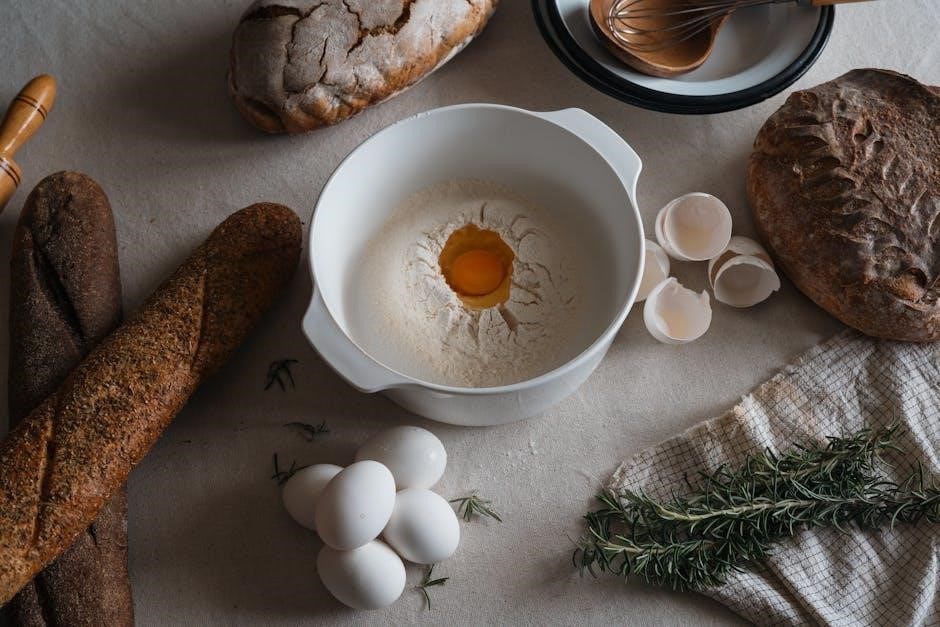
Ingredients for Sourdough Bread
Sourdough bread typically requires bread flour‚ water‚ salt‚ and a sourdough starter. Optional ingredients like wheat germ can enhance flavor and texture for unique variations.
Types of Flour for Sourdough
Bread flour is ideal for sourdough due to its high protein content‚ creating a strong gluten structure. All-purpose flour can substitute but may result in a denser loaf. Whole wheat flour adds nutty flavors and extra nutrition‚ while ancient grains like Kamut or Spelt offer unique textures. Rye flour is another popular choice‚ producing a distinctive‚ slightly sour taste. Triticale‚ a hybrid of wheat and rye‚ balances complexity and ease of use. Experimenting with different flours allows bakers to craft loaves with varied flavors and textures‚ enhancing the sourdough experience.
Importance of Water Quality
Water quality significantly impacts sourdough bread‚ as it directly affects fermentation and dough development. Chlorinated water can inhibit the natural yeast and bacteria in the starter‚ slowing fermentation. Using filtered or bottled water is often recommended to avoid this issue. Hard water‚ rich in minerals‚ can enhance bread texture‚ while soft water may lack necessary minerals for gluten formation. Proper water temperature is also crucial; overly hot water can kill the starter‚ while cold water slows fermentation. Ensuring the right water quality and temperature is essential for achieving optimal results in sourdough baking.
Role of Salt in Sourdough
Salt plays a crucial role in sourdough bread‚ enhancing flavor‚ controlling fermentation‚ and strengthening gluten structure; It inhibits excessive yeast activity‚ ensuring a balanced rise‚ and adds depth to the bread’s taste. Salt also acts as a natural preservative‚ extending shelf life. Timing matters; adding salt after the autolyse phase allows proper dough hydration. Using high-quality‚ non-iodized salt is recommended for optimal results. Balancing salt levels is key to achieving the perfect sourdough loaf‚ as too little can lead to blandness and instability‚ while too much can overpower the bread’s natural complexity.
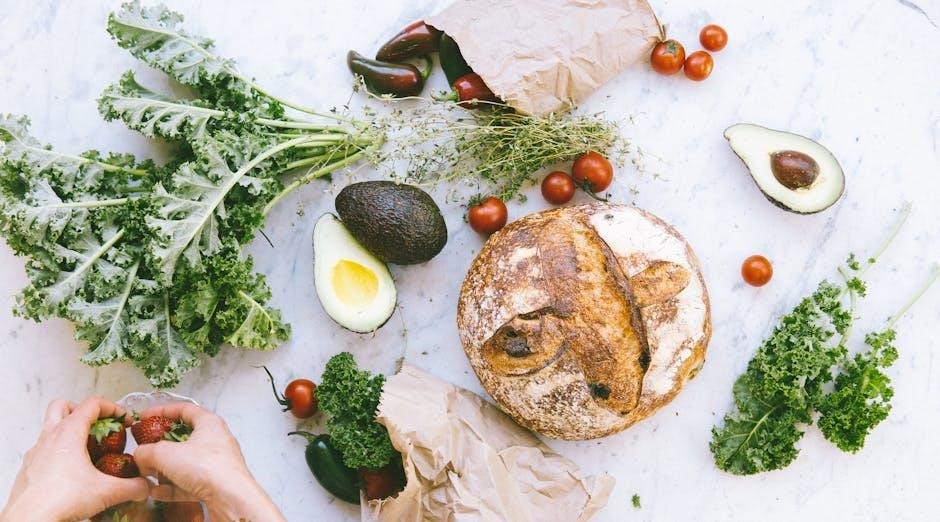
Optional Ingredients for Variation
Optional ingredients can elevate sourdough bread‚ offering unique flavors and textures. Herbs like rosemary or thyme add aromatic notes‚ while cheeses such as Parmesan or cheddar introduce savory depth. Dried fruits or nuts provide sweetness and crunch. Whole grains or ancient flours like rye or spelt enhance complexity. Spices‚ seeds‚ or even jalapeños can create bold variations. These additions allow bakers to experiment and tailor loaves to personal preferences‚ making each batch distinct and exciting. The possibilities are endless‚ encouraging creativity in the sourdough tradition while maintaining its foundational charm.
Equipment Needed
Essential equipment for sourdough includes a large mixing bowl‚ a stand mixer or wooden spoon‚ a dough scraper‚ baking sheets‚ an oven‚ and a wire cooling rack.
Essential Tools for Mixing and Proofing
A large mixing bowl‚ stand mixer‚ or wooden spoon is ideal for combining ingredients. A dough scraper helps handle sticky dough effectively. For proofing‚ a lightly oiled bowl or a proofing basket lined with parchment paper is recommended. A warm‚ draft-free environment‚ such as an oven with the light on‚ promotes fermentation. Stretching and folding the dough during proofing enhances gluten development and ensures even fermentation. These tools and techniques are crucial for achieving the perfect rise and texture in sourdough bread‚ making the process both efficient and rewarding.
Baking Tools and accessories
Baking Tools and Accessories
Essential baking tools include a Dutch oven or ceramic pot with a lid‚ which traps steam for a crispy crust‚ and a preheated baking stone or steel to ensure even heat distribution. A peel or parchment-lined baking sheet is ideal for transferring dough smoothly. A dough scraper or razor blade aids in scoring the bread‚ allowing it to expand during baking. Oven mitts and a cooling rack are must-haves for safe handling and cooling. These tools enhance the baking process‚ helping achieve a professional-quality sourdough crust and texture at home.
Creating the Sourdough Starter
Creating a sourdough starter involves mixing flour and water to foster natural yeast fermentation. Regular feeding and patience nurture this living culture‚ essential for bread rise.
Step-by-Step Starter Creation
Creating a sourdough starter begins with mixing equal parts of flour and water in a clean glass container. Feed the starter daily with fresh flour and water‚ discarding half before each feeding to maintain balance. Keep it in a warm‚ draft-free place. Over 7-10 days‚ bubbles and a tangy aroma will indicate readiness. Consistency and patience are key. Once active‚ store it in the fridge to slow fermentation or refresh it before baking. This natural process fosters a healthy‚ bubbly starter for authentic sourdough bread.
Feeding Schedule for Optimal Activity
A consistent feeding schedule is crucial for a healthy sourdough starter. Feed your starter once daily with equal parts of flour and water (1:1:1 ratio). Before feeding‚ discard half of the starter to maintain balance. Use room-temperature‚ filtered water and high-quality flour for best results. After feeding‚ store the starter in a warm‚ draft-free place. Once active and bubbly‚ it can be stored in the fridge to slow fermentation. Refresh it before baking by feeding it once or twice. Regular feeding ensures optimal activity and a robust‚ tangy flavor for your sourdough bread.
Recognizing a Healthy Starter
A healthy sourdough starter is bubbly‚ frothy‚ and nearly double in size after feeding; It should have a tangy‚ slightly sour aroma and a lively‚ active appearance. If the starter is sluggish‚ it may need more frequent feeding or a warmer environment. A healthy starter will also develop a smooth‚ shiny surface and a slightly elastic texture when stirred. These signs indicate it is ready to use in bread making‚ ensuring a robust rise and flavorful loaf.
Preparing the Dough
Preparing the dough involves mixing flour‚ water‚ and sourdough starter‚ followed by rest and fold cycles. This process develops gluten and ensures even fermentation‚ creating a balanced texture.
Autolyse Phase Explained
The autolyse phase involves mixing flour and water to hydrate the starches‚ creating a smooth dough before adding the sourdough starter. This step enhances extensibility and reduces mixing time‚ ensuring better gluten development. It’s a crucial initial step that promotes even fermentation and a tender crumb. Proper hydration during autolyse is essential for achieving the desired dough consistency and flavor in the final loaf. This process is simple yet vital‚ making it a foundational technique in sourdough bread making.
Incorporating the Starter
Incorporating the sourdough starter into the dough is a critical step that initiates fermentation. After the autolyse‚ the starter is gently mixed into the hydrated flour‚ ensuring even distribution. This step introduces the natural yeast and bacteria‚ which begin breaking down sugars and producing CO2. Proper mixing is essential to avoid overworking the dough while ensuring the starter is fully integrated. This process lays the groundwork for the bread’s rise and develops its characteristic tangy flavor. Gentle folding and minimal agitation help preserve the delicate balance of the starter’s activity.
Understanding Dough Hydration
Dough hydration refers to the ratio of water to flour in the dough‚ crucial for achieving the desired texture and crumb structure. Proper hydration ensures the dough is neither too dry nor too sticky‚ allowing for effective fermentation. The water absorbs into the flour‚ creating a network of gluten strands that give bread its elasticity and rise. Overhydration can lead to a dense crumb‚ while underhydration results in a dry loaf. Balancing hydration is key to producing a bread with a light‚ airy interior and a crisp crust‚ as emphasized in sourdough techniques.
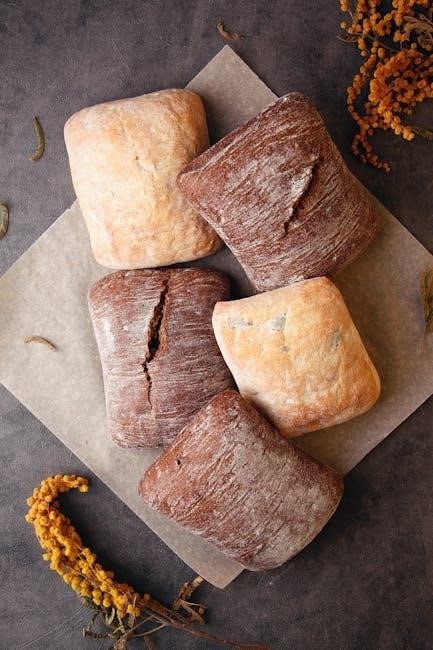
Dough Shaping Techniques
Dough shaping techniques‚ like rounding and benching‚ enhance structure and appearance‚ transforming dough into a refined loaf through precise‚ deliberate movements.
Basic Shaping for Beginner Bakers
Basic shaping techniques are essential for creating a well-structured loaf. Start by gently rounding the dough on a floured surface to form a smooth‚ even shape. For a simple boule‚ place the dough onto a lightly floured surface and use your hands to tuck the edges under‚ forming a tight ball. Avoid over-working the dough to preserve its delicate air pockets. Use a bench scraper to guide and rotate the dough as needed. This foundational technique helps develop the loaf’s structure and appearance‚ making it easier to handle during proofing and baking.
Advanced Shaping Techniques
Advanced shaping techniques elevate your sourdough bread to professional levels. Try creating a batard by gently stretching and folding the dough into an oval shape‚ ensuring even tension. For a baguette‚ roll the dough into a long‚ thin cylinder‚ using a light touch to maintain air pockets. Spiral shaping involves coiling the dough into a circular or spiral form‚ adding visual appeal. Practice laminating by folding and rolling dough for intricate patterns. Use a bench scraper or dough whisk to guide the dough smoothly. These techniques require precision but yield stunning‚ unique loaves with exceptional texture and presentation.

Proofing and Fermentation
Proofing and fermentation are critical steps where the dough rests‚ allowing the sourdough starter to activate‚ producing gases that give the bread its signature texture and flavor.
First Proof Process
The first proof‚ or bulk fermentation‚ begins after mixing the dough. It allows the sourdough starter to ferment‚ developing flavor and texture. During this phase‚ the dough rests in a lightly oiled bowl‚ covered to prevent drying. Every 30 minutes‚ gentle stretching and folding are performed to redistribute yeast and even out fermentation. This process typically lasts 4-6 hours at room temperature‚ depending on activity. Proper handling ensures a balanced rise and lays the foundation for a well-structured loaf. Patience is key as the dough transforms‚ preparing for the next stage.
Second Proof and Its Importance
The second proof‚ or final rise‚ occurs after shaping the dough. It allows the sourdough to develop further‚ enhancing flavor and texture. Placed in a cool‚ draft-free environment‚ the dough proofs for 2-4 hours‚ depending on temperature. This step is crucial for achieving a light‚ airy crumb and a well-balanced crust. Over-proofing can lead to a dense loaf‚ so monitoring is essential. The second proof prepares the bread for baking‚ ensuring it reaches its full potential in both structure and flavor‚ making it a critical step in the sourdough process.
Baking Sourdough
Preheating the oven to high heat is essential for sourdough baking. Using steam creates a crispy crust‚ while scoring the bread allows for controlled expansion. Bake at 500°F for 25-35 minutes for a golden finish.
Preheating the Oven
Preheating the oven is a critical step in baking sourdough bread‚ as it ensures even cooking and a crispy crust. Ideally‚ preheat your oven to 500°F (260°C) with a Dutch oven or baking stone inside for at least 30 minutes. This high heat helps create steam‚ which is essential for bread development. Place a pan of water or ice in the oven to generate steam‚ enhancing crust formation. Once preheated‚ carefully place the dough on the stone or in the Dutch oven‚ and bake for 25-35 minutes until golden. Proper preheating guarantees a perfect loaf.
Scoring the Bread
Scoring the bread is an essential step before baking‚ allowing the dough to expand evenly and preventing unwanted splits. Use a lame or sharp knife to make confident cuts‚ ensuring clean edges. The cuts should be shallow and precise‚ guiding the bread’s rise. This technique enhances the loaf’s appearance‚ creating a beautiful crust. Proper scoring requires a steady hand and minimal pressure to avoid dragging the dough. It’s a simple yet crucial step that elevates both the visual appeal and texture of your sourdough bread‚ making it a true artisanal masterpiece.
Baking Techniques for Perfect Crust
Achieving a perfect crust requires precise baking techniques. Preheat your oven to its highest temperature with a Dutch oven or stone inside to create steam. Place the dough gently‚ avoiding stretching. Score the bread just before baking to control expansion. Bake with steam for the first 20-25 minutes to develop color and crispiness. Reduce heat slightly if the crust browns too quickly. Monitor closely to ensure an even golden-brown finish. Proper baking techniques enhance the crust’s texture and appearance‚ making your sourdough truly exceptional.
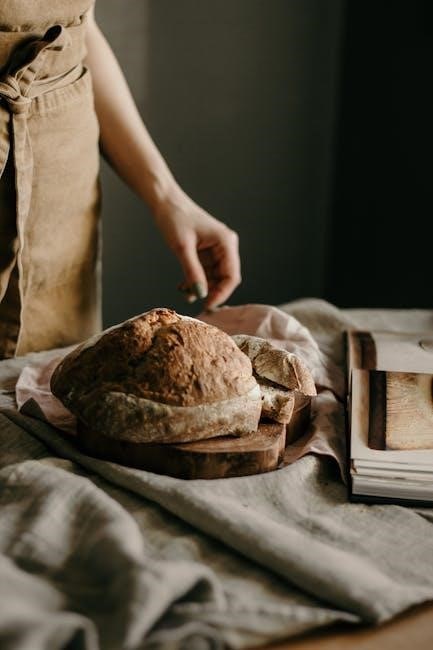
Cooling and Storage
Proper cooling and storage are crucial for maintaining sourdough’s freshness. Cool on a wire rack to prevent sogginess‚ then store in an airtight container or bread box.
Importance of Cooling
Cooling sourdough bread is essential to preserve its structure and flavor. After baking‚ place the loaf on a wire rack to allow air circulation‚ preventing sogginess. Avoid wrapping it immediately‚ as this traps moisture and softens the crust. Proper cooling ensures the bread retains its crisp exterior and chewy interior. Allowing it to cool completely before slicing or storing is key for optimal texture and longevity. This step is vital for maintaining the bread’s quality and preventing staleness.
Proper Storage Methods
To maintain the quality of sourdough bread‚ proper storage is essential. Once cooled‚ store the bread in a paper bag or bread box at room temperature for up to 3 days. This preserves the crust’s crispiness and prevents sogginess. For longer storage‚ freeze the bread by wrapping it tightly in plastic wrap or aluminum foil and placing it in a freezer-safe bag. Frozen bread can be stored for several months and thawed at room temperature when needed. Proper storage ensures freshness and maintains the bread’s texture and flavor.
Making sourdough bread is a rewarding journey that combines patience‚ practice‚ and passion. With proper techniques and care‚ you can master the art of creating delicious‚ crusty loaves at home.
Final Tips for Successful Sourdough
- Always use a mature‚ active sourdough starter for the best rise and flavor.
- Maintain consistent temperatures during proofing to ensure proper fermentation.
- Avoid overmixing the dough to preserve its delicate structure.
- Preheat your oven thoroughly for a crispy crust.
- Be patient‚ as sourdough requires time to develop its characteristic taste and texture;
- Store your bread properly to maintain freshness and prevent staleness.